Classic Indiana Limestone Gets a Modern Thin Veneer Cut and It’s Easy to Install
If you’ve mastered the patio project, it’s time to add thin veneer installation to your skill set. This quick to apply material is an easy upgrade to outdoor kitchens, fireplaces, and building exteriors. Learn the quick and easy process to install INDIANA LIMESTONE- FULL COLOR BLEND™ veneer, available at all nine Swenson Granite Works retail locations. For nearly 200 years, Indiana limestone has been an enduring building stone choice and has become an American classic. Think the Empire State Building, the Pentagon, and the iconic Biltmore estate. It has a timeless look that residents want and is a great fit for adding a bit of history to new construction. Contractors favor it because, unlike brick or thick stone veneer which can be labor intensive and difficult to install, Indiana limestone thin veneers are lightweight and easy for a single contractor to manage.
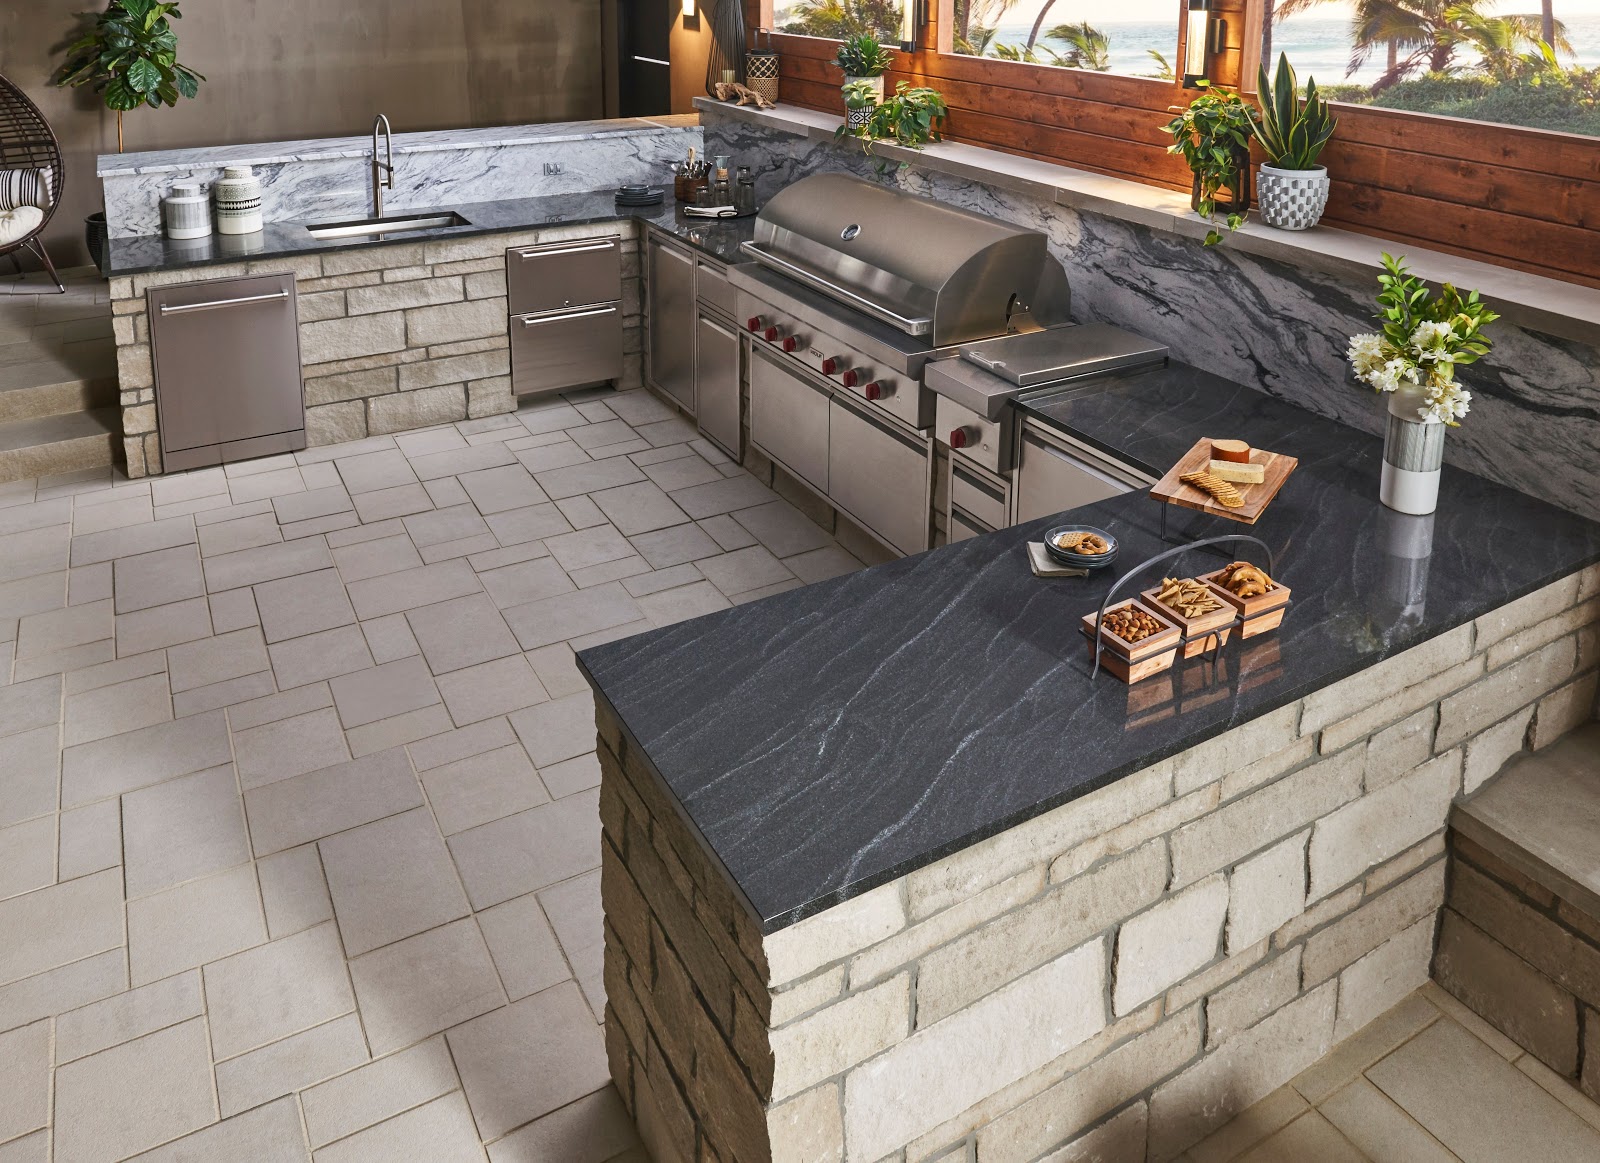
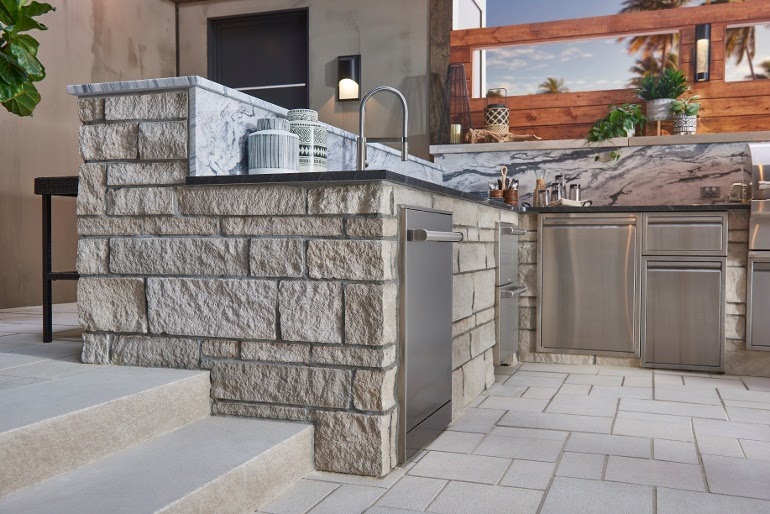
BERKSHIRE™ Indiana limestone thin veneer and Indiana Limestone – Full Color Blend pavers were used for this outdoor kitchen
Indiana limestone veneers bring durability to any residential project
Indiana limestone is like the white button-down of natural stones: you can dress it up or down and it goes with just about anything. Depending on how you finish it, it can be rustic or it can be classic. Because it’s the same composition throughout, the stone resists fading over decades, is impervious to the freeze-thaw cycle, and requires very little maintenance.
A quick rundown of the two styles:
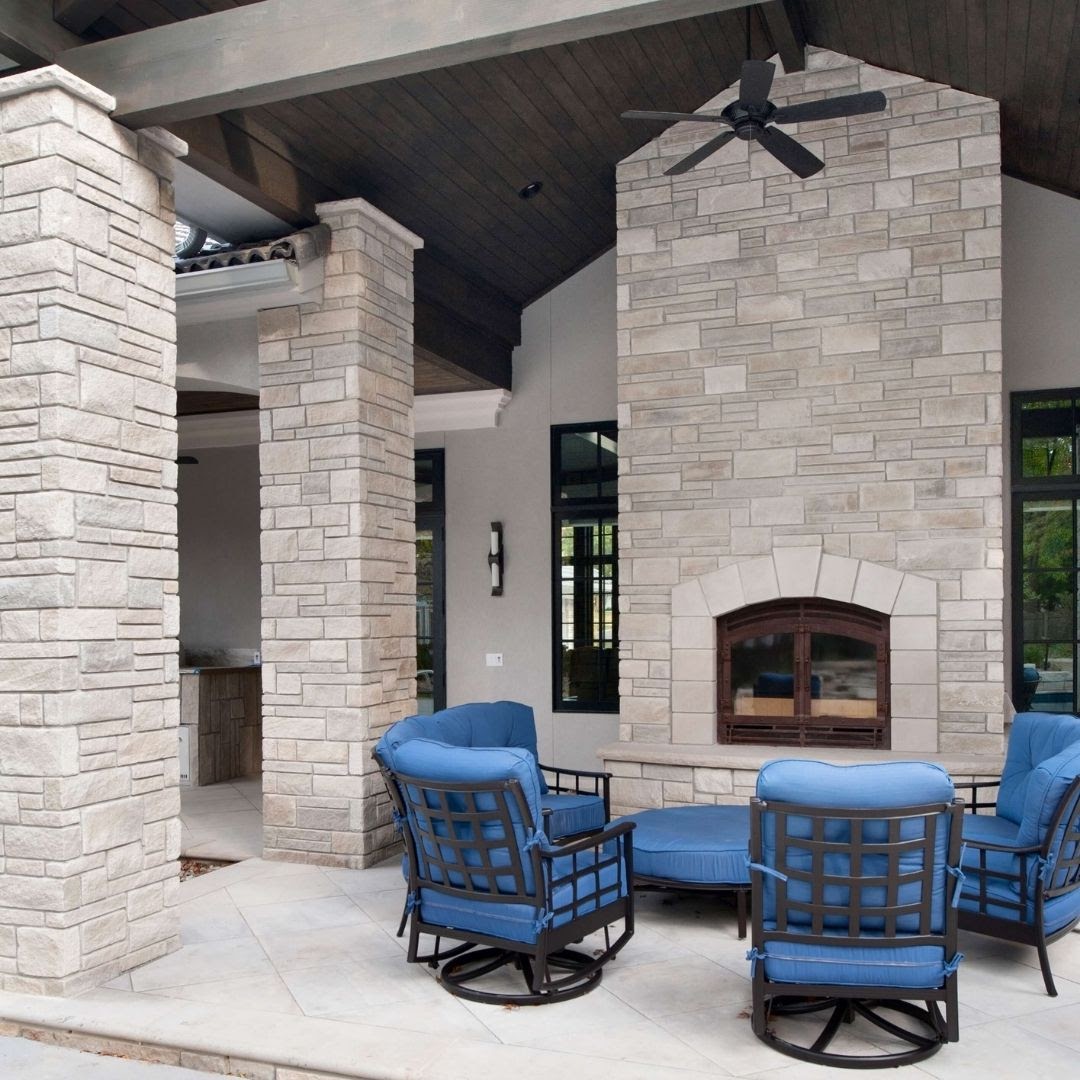
BERKSHIRE™ can inspire those historic design longings, while offering the durability and versatility that comes with all Indiana limestone products. Clean edges and a split face make this Indiana limestone veneer a versatile material for modern and traditional designs. The split faced multicolor natural stone can be used as an accent piece for indoor or outdoor fireplaces, interior or exterior walls, or walkways. Stocked in thin veneer and also available in full bed veneer.
ROCKFORD ESTATE BLEND® is a tumbled product stocked in sawn thin veneer and available in full bed veneer. It contains a full color range and displays the sense of permanence found only in natural stone. These veneers offer a robust option for your design vision, whether it be homes, offices, buildings, fireplaces, chimneys, landscapes, or other architectural projects. The lightly-tumbled Indiana limestone surface and broad range of shapes make this a rustic looking veneer. It’s ideal for creating a traditional, handcrafted appearance. If you are looking to cover over an old brick fireplace with the space-saving dimensions of a thin veneer, Indiana limestone is the right stone for the job.
Reduce Costs, Simplify the Project
Thin stone veneer can be installed over a variety of solid substrates including CMU’s, cement backer board or even existing masonry, which can eliminate the challenge of removing the original brick or block underneath. The limestone is cut thin at 1-3/16 inch, but still maintains the authentic look and feel of a thicker stone without the heavy weight of a 3 – 6 inch deep full bed veneer, making installation fast and simple.
As an example, let’s look at an exterior fireplace installation. While full dimension stone masonry could require a base or foundation structure as deep as 4 feet into the ground, with thin stone veneer, you can build right off a wood floor because it’s bonding to the actual structure and not bearing as much weight on the floor. Not only does this reduce costs and simplify the installation process, but it gives contractors the flexibility to create a natural stone design with almost any fireplace in a home or in the backyard.
Installing Indiana Limestone Thin Veneers
The thickness of the thin stone veneer makes it quick and easy to install. With the variety of polymer modified setting materials available at local building material supply centers, companies like Laticrete have done a great job at R&D and testing their products. In this installation we’ll be using Laticrete MVIS (Masonry Veneer Installation System).
SUBSTRATE & PREP
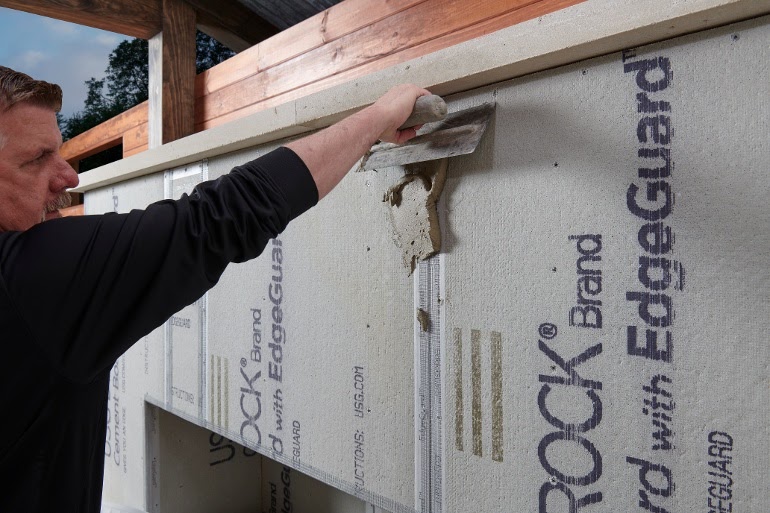
Starting with cement backer board glued and screwed to exterior grade sheathing with fasteners set at a proper depth, adhere mesh tape to all seams, overlapping at the joint intersections. Mud the mesh-taped joints with mortar and trowel off the excess for a smooth and even surface.
WATERPROOFING
Roll or brush on an approved waterproofing membrane (in this case MVIS Air & Water Barrier) using a 1/4 – 1/2 inch nap roller, applied in 2 coats, allowing the first coat to dry before applying the second coat. Once the membrane is dry to the touch the veneer installation can now begin.
Steps To Install Estate Veneer Series Thin Veneer:
- Mix mortar with water to desired consistency per manufacturer’s recommendations (in this case MVIS Veneer Mortar).
- Key skim coat of mortar to cement backer board approx 1/2 – 3/4 inch thick using the flat side of a trowel. Using a 1/2 x 1/2 inch notched trowel (or 3/4 inch loop trowel) held at a 45 degree angle, run grooves into mortar.
- Back butter the entire rear of the stone veneer with a thin skim coat.
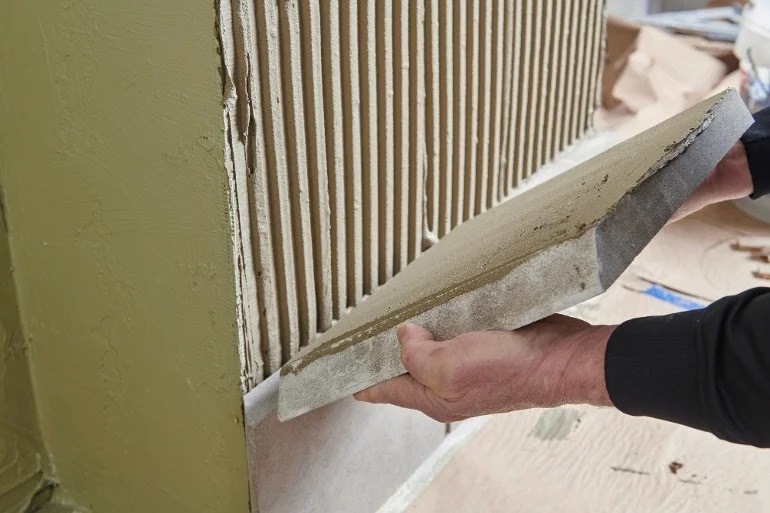
- Install the veneer into the desired location by applying firm pressure, locking it into the mortar bed, and sliding the veneer back and forth slightly into the desired final position. Ensure mortar squeezes out around edges to verify it is adhered properly to the substrate.
- Clean the excess, extruded mortar with the trowel to allow space for pointing the joints.
- Check veneer to ensure 100% coverage by pulling off substrate and inspecting the back for voids per code.
The final step will be to install the pointing mortar in the desired pre-mixed color to complement the design.
- Mix the pointing mortar to the manufacturer’s recommendation and load it into a grout applicator bag. Apply the mortar into the joint, filling it completely while being careful to minimize smears and droppings onto the face of the veneer.
- Accidental smears or droppings can be cleaned with a stiff nylon brush when dry.
- When the mortar is thumbprint dry, tool the joints for the desired appearance.
- Once the mortar is fully cured, use a brush to clean off any excess dried material.
That’s it! A simple, straightforward application that instantly upgrades projects from cookie-cutter to custom.
Get the product specifications for Indiana limestone thin veneers. Download the Price Guide.